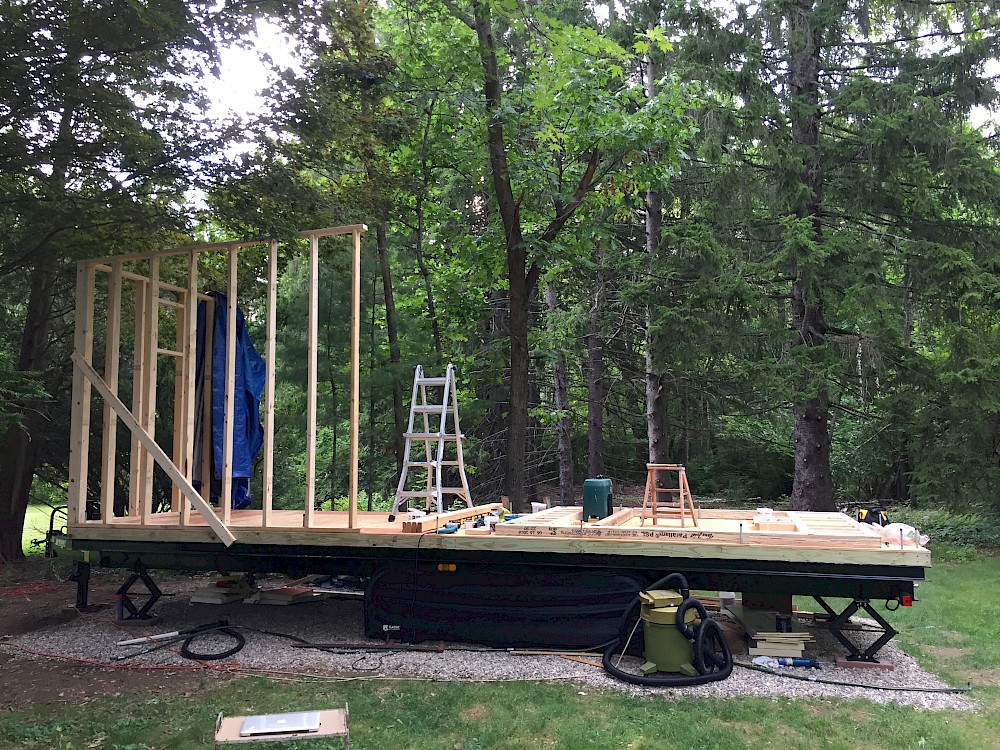
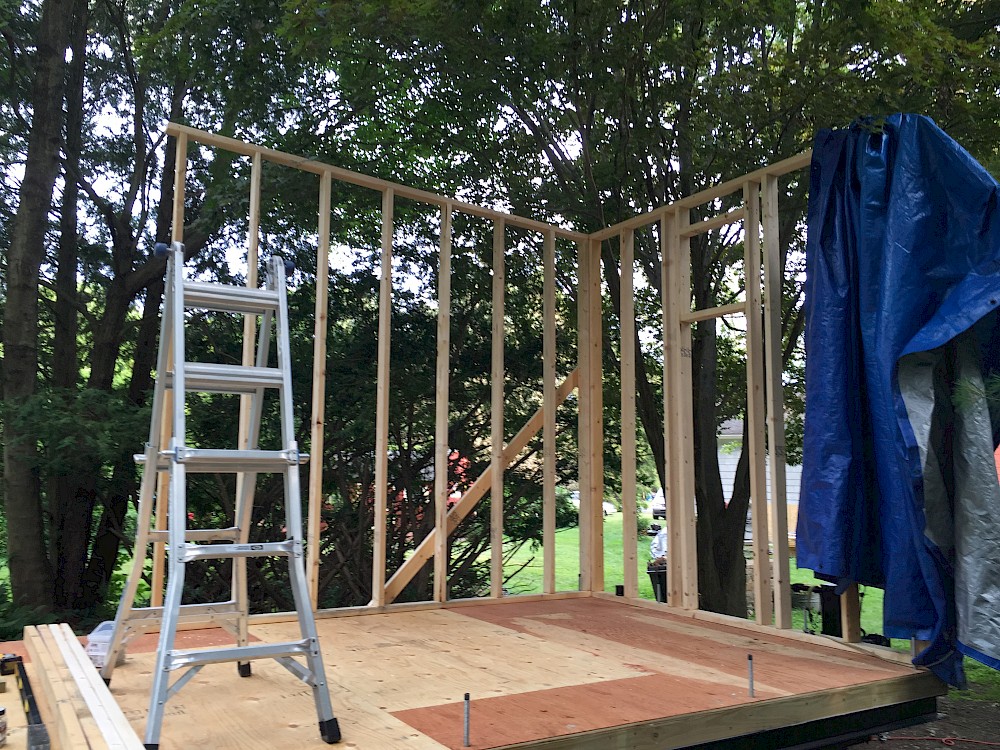
The past 2-3 weeks has been focused on wall construction, with three wall segments now standing and one nearing completion.
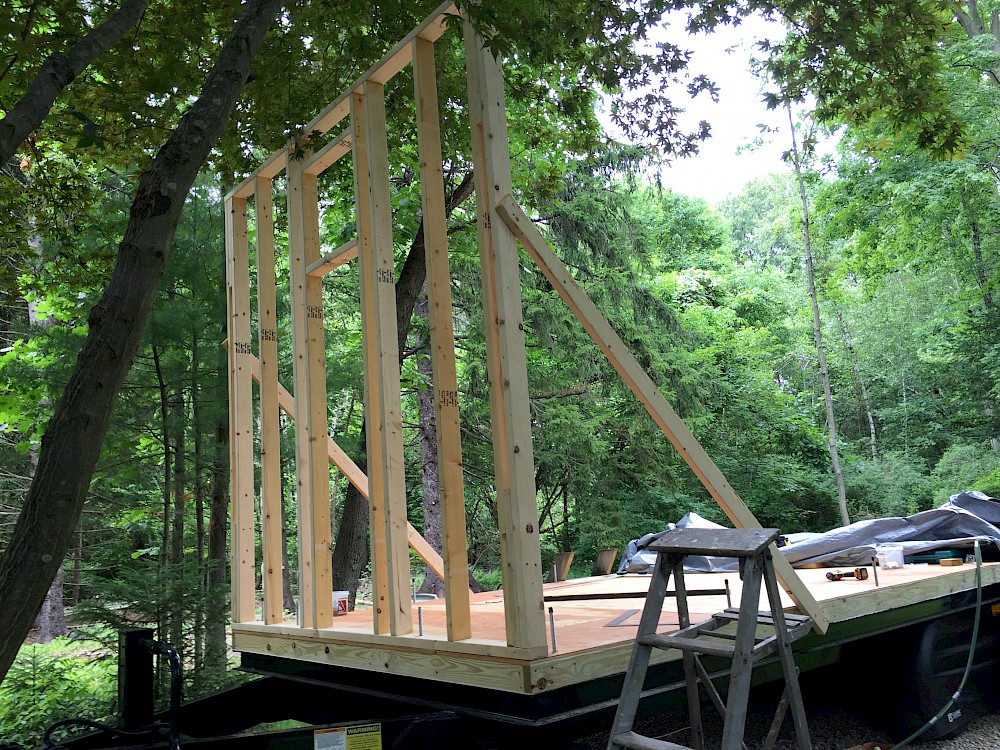
Before I began on the walls, I still had a few decisions to make. This ended up taking longer and being more stressful than I had anticipated. The main decision I faced was the interplay of the interior headroom, roof pitch, and wall height. My design (which I’ll show more of soon) features a roof that is sloped in the long (24’) dimension, with the lowest point at the trailer hitch, sloping gently upwards towards the far end with a vaulted ceiling and wall-to-wall windows (more on that to come). My design also features a roll-out bed, as it has no loft. To accomplish this (and provide some extra under-floor storage), the kitchen and bathroom at the hitch end of the house are also raised 16”. My trailer deck is roughly 32” off the ground. With a legal road height limit of 13’ 6” and a practical desire to keep the height as reasonably low as possible, every inch counts. It’s also worth considering that the IRC (International Residential Code) specifies that habitable rooms must have a ceiling height of 7 feel (84 inches) in at least 50% of the room. Since tiny houses have a somewhat vague legal status at the moment, this is not necessarily required. In fact, many tiny houses have ceiling heights closer to 78” under their lofts. However, 7’ is generally a good rule of thumb for comfort.
What I eventually settled on was to use the standard of 8’ 2x4s for the rear (bathroom) wall at its lowest point. This put me at around 82” for the ceiling height at its very lowest point, and gets me to a generous 86” at the highest point in the bathroom. At it’s highest point in the living room, the ceiling will rise to a luxurious (but not excessively superfluous) 9 1/2 feet. The slope of the roof comes out to 3.2 degrees, which is a bit more than 1/2” in 12”. This will require a special EPDM or metal roofing which is rated for a low slope.
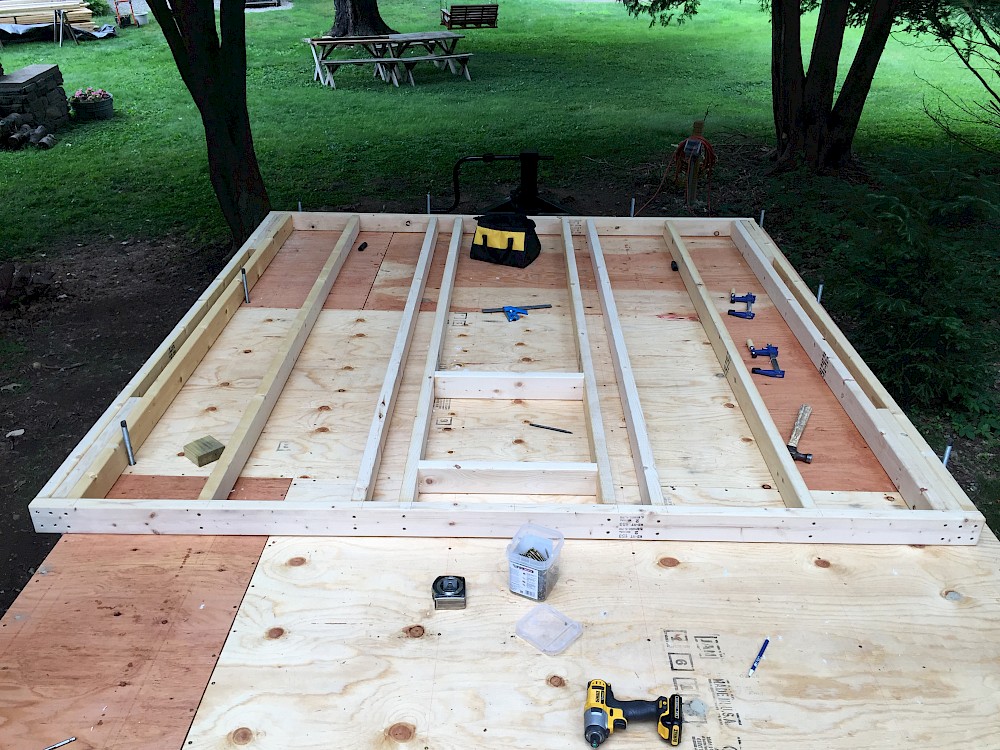
With that decision out of the way, I was able to start on the bathroom wall. I started by marking and boring 7/8” holes to accommodate the 5/8” threaded rods on the trailer. After ensuring the bottom plate would fit correctly, I clamped the top and bottom plates together and marked the stud locations.
I have decided to go with the traditional 16” on center stud spacing on my house (vs. 24” oc), but am saving weight wherever possible by using “advanced framing” techniques like using single top plates with metal plates at splices, omitting headers on non-load bearing walls, and using header hangers instead of jack studs. It’s important when making the decision to use 16” or 24” stud spacing to also consider the weight of your sheathing, roof decking, interior wall material, and subfloor. Increasing the spacing to 24” often requires substituting a thicker plywood or osb material to compensate, which means you’ve lost any weight savings you may have gained from using fewer studs.
I have also decided to save weight by using spruce (S-P-F) wood. This stuff is amazingly light, easy to work with, and is also inexpensive. However, it is not quite as strong as Douglas Fir or Pine. For this reason, I am also using Douglas Fir strategically on my window wall, to maximize strength where it is needed. If you are using 2x4s for your roof, I would definitely use Douglas Fir and not SPF. However, I am using 2x6’s and will probably stick with SPF for these. If in doubt, check span tables and make sure you know the snow load requirements for your area (assume 30 or 40 to be safe).
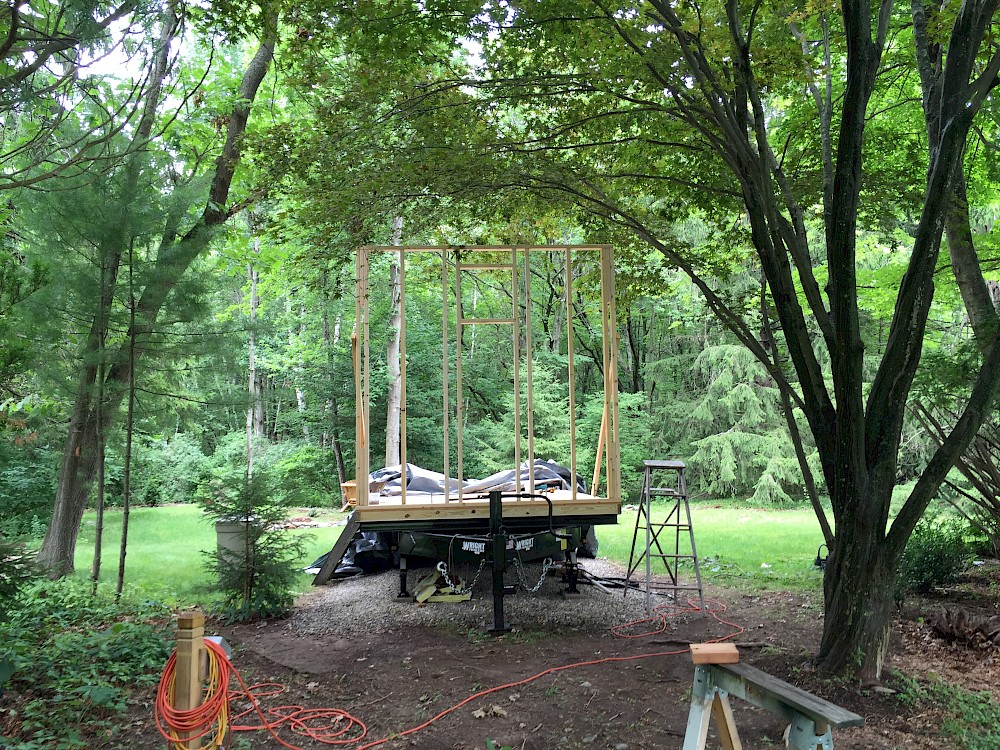
I was amazed how light the first wall was. I probably could have raised it myself, but was glad to have my father’s help in saving my back the unneeded additional stress. Once situated, We added some temporary 45 degree bracing to keep the wall from blowing over in the wind. It’s amazing what a 45 degree angle will do for a structure!
I decided to wait on fastening the bottom plate so that I could adjust the position and square everything up nicely once the other walls were in place.
Speaking of fastening, let’s talk a bit about fasteners. I debated for quite some time whether to use a nailer or screws with an impact driver. I had purchased a 12W DeWalt impact driver a while back, but a few months ago purchased a nail gun and thought for a time that I had settled on using nails, being that they are the tried-and-true (and code-approved) method. However, after talking with Chris, my engineer, he expressed his preference for screws due to their superior resiliency to pull-out. The problem is that there are few screws on the market that are approved/rated and up to the task of framing a house. One of the few that is is the R4 multipurpose/framing screw by GRK. I can’t say enough about these screws. They are extremely tough, well engineered, and go in great every time. Oddly, it is very difficult to find this screw in a 3-1/2” length which would be comparable to a 16d nail. Most stores only carry 3-1/8” and 4” (what gives??!!). 3-1/8” is probably sufficient, but I didn’t want to take any chances. I finally found the 3-1/2” screws on Amazon.com. It’s also good to have some of the #10 3-1/8” screws handy for joining 2x4s, where you don’t want the screws to stick too far out the other side. For attaching subfloor and sheathing, I am using #9 2-1/2”, which is comparable to an 8d nail.
After several instances already where I’ve needed to remove a stud to shave a bit off, or even an entire top plate, I am very glad that I took my engineer’s advice and framed with screws instead of nails.
For the long (24’) walls, I’ve decided to build these in ~8 foot sections, with some variation in length to avoid having to splice a wall in the middle of a window. We have 3 sections in place and have started on the specially engineered window wall at the opposite end, which must be raised before we can continue on any of the other sections. More on that in the next entry!

Comments: 1 Comment
Comment
Comment by Skyler Irvin on 14 September 2016 1:08 am
This is great. Love the design and the realistic reports. I'm just started something similar, 90 percent done with building the trailer, and about half way on the sub floor. I def under estimated the price of materials so far.... Looking forward to more posts!
Post a comment